


Intro
Knowing a language will only get you so far. If you have to build everything by yourself, you'll never get things done before the deadline. After you learned a programming language, it's smart to add a framework to your arsenal. Django is the most popular full-stack framework for Python. Once you master it, the production of web applications will be fast and simple.
For your first experience with Django, let's create a BookClub application. User story goes like this. The administrator will post a book with a deadline. After the deadline passes, users will be able to discuss the book. Users will also be able to browse through old and coming-soon book selections.
Django
The Web framework for perfectionists with deadlines
Django is an open-source high-level Python framework. Django framework covers user authentication, security, content administration, and much more. One of the best traits of Django is that it comes with an out-of-the-box administrative interface.
It also majorly simplify the work with a database. Because if its Models you don't need to work directly with a database. At the same time, you can easily switch one SQL database for the other.
Django emphasizes rapid development - you can have a working, secure and admin-editable website in a matter of hours.
All-in-all, it's a framework worth knowing.
Prerequisites
- Basic knowledge of Python
- Basic knowledge of HTML
- Basic knowledge of CSS Bootstrap (you'll be using it, it's not necessary for you to understand how it works)
Setup
First, create a new directory named BookClub. Open a terminal and navigate to it. Create and activate a new Python virtual environment:
$ python3.9 -m venv env
$ source env/bin/activate
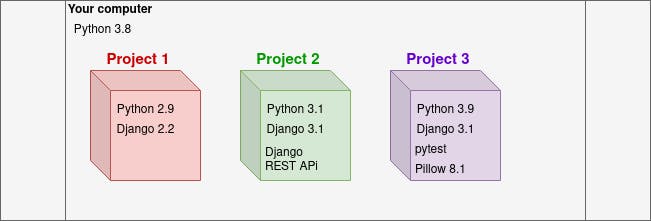
Virtual environment is a tool that helps to keep your project's dependencies separate from dependencies of other projects. It's like a little computer with its own installation of Python and other packages (Django, requests, Flask, ...) inside your computer.
After your virtual environment is active, install Django:
(env)$ pip install django
With Django installed, generate a new project:
(env)$ django-admin startproject tutorial .
django-admin.py is a command-line utility that offers a bunch of administrative tasks.
In this case, with its help, you can create a project named tutorial.
As you can see after you run it, it creates some files that are the core of a Django project.
. after the tutorial is an argument that tells Django to add files for a new project to the current directory instead of creating an additional and unnecessary folder for your project.
You have already created a directory for the project previously and you don't need an additional one.
Next, create an app, named bookclub:
(env)$ django-admin startapp bookclub
This generates a folder named bookclub, that provides a basic structure for your app. You'll get to know most of the files in the app throughout this tutorial.
There is always only one project, but you could have multiple apps. In this tutorial, you'll need only one and it may look like overkill, but it helps you stay well-organized when working on larger projects.
Project vs. app
Understanding the importance of differing between a project and an app can be confusing at the beginning.
A project is the application you're creating. Apps are its self-sufficient parts. They don't intertwine with each other. In theory, you could copy it from one project and paste it into another without any modification.
Let's say you're creating an application for a library. You'd have a project called Library. You'd also have apps - one for managing the customers and one for managing the books. Then you'd get a job creating an online store app that you'd need to register for. You could reuse the customers app from the Library project.
Going further, open tutorial/settings.py and search for INSTALLED_APPS.
Register the bookclub app at the end:
# tutorial/settings.py
INSTALLED_APPS = [
    # ...
    'django.contrib.messages',
    'django.contrib.staticfiles',
    'bookclub',
]
INSTALLED_APPS is a list of strings designating all applications that are enabled in your project.
If the application is not registered in the INSTALLED_APPS, you won't be able to use it.
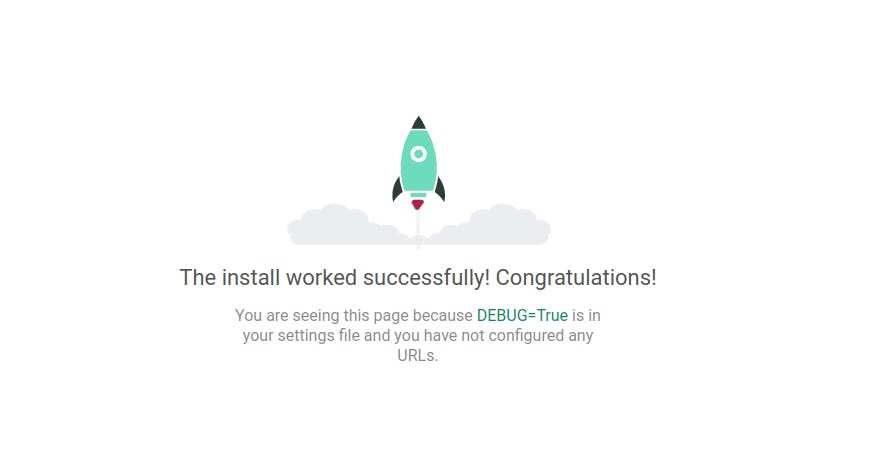
Another great trait of Django it's that it rewards you very quickly and lets you know you managed to start a Django app right away. Run the local server with a command:
(env)$ python manage.py runserver
Navigate to: http://127.0.0.1:8000/
manage.py does the same things as django-admin, but it has DJANGO_SETTINGS_MODULE set to your project's settings.py file.
This is the structure you have currently:
BookClub
├── manage.py
├── tutorial
│   ├── __init__.py
│   ├── settings.py
│   ├── asgi.py
│   ├── urls.py
│   └── wsgi.py
├── bookclub
│   ├── admin.py
│   ├── apps.py
│   ├── __init__.py
│   ├── migrations
│   │   └── __init__.py
│   ├── models.py
│   ├── tests.py
│   └── views.py
├── venv
Models
As I mentioned at the beginning, in Django, you don't work directly with the database. You do that with models which are part of Django ORM (Object-relation mapper). Each model represents an entity inside your application - e.g. a book. Models are represented with classes that inherits from models.Model. This gives them the ability to store and retrieve data to/from the database. Each model has defined fields. You can enhance its behavior by adding methods to it. Each instance of your model represents a single row inside the database table. Let's see all of that in practice.
First, create a new file "bookclub/models.py" and create your first model Book:
# bookclub/models.py
from django.db import models

class Book(models.Model):
    book = models.CharField(max_length=100)
    description = models.TextField()
    read_by = models.DateField()
Book model has 3 fields.
For each field, you have to provide a name and a field type. Some field types require or allow additional parameters.
In this case, those fields are:
- book (title) with a maximum of 100 characters
- description is a large text field. The number of characters in it is not limited in Django, but it depends on the database you're using (eg. for MySQL the limit is 4GB).
- read_by date field
You can see all the field types here.
You created a model in models.py but it doesn't exist in the database yet.
When you make a change in your models.py file, you need to communicate that to your database.
You do that with migrations.
Open the migrations folder inside your bookclub directory. There you'll see only one file, __init__.py.
Now run the following command:
(env)$ python manage.py makemigrations
Check the folder again and you'll be able to see another file, 0001_initial.py.
This is the migration you created. If you open it, you'll see the fields you specified in there.
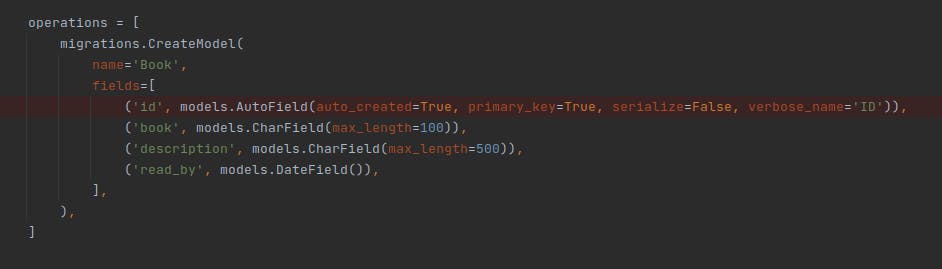
Now you just need to execute this migration with:
(env)$ python manage.py migrate
Migrations make sure that your database schema matches your models. They add tables, add fields, alter fields, remove tables, ...
If you're using Django 3.2, you might get a warning upon migration:
Auto-created primary key used when not defining a primary key type, by default 'django.db.models.AutoField'You can ignore it for now, but you can read more about it in Django release notes.
Admin
There's an idea of books, but there's no record of any book.
You can add them via the administration panel that Django provides out of the box.
To be able to add new records you need to register the Book model to your admin. You can do that inside "bookclub/admin.py":
# bookclub/admin.py
from django.contrib import admin
from .models import Book

admin.site.register(Book)
Besides registering a model you also need a user to login into the administration portal. Django provides you a simple way to create a superuser - the one who can do anything. To do that, stop the server with Ctrl + C and run:
(env)$ python manage.py createsuperuser
It will prompt you for a username, email address (you don't need to provide one), and password.
Start the server again:
(env)$ python manage.py runserver
Navigate to 127.0.0.1:8000/admin/bookclub/book and login with the superuser you created.
Click on Add and add 2 new books of your choosing. I added Harry Potter and Anne of Green Gables. Set one to the past date and one to the future. You'll need that further down the road.
Neat trick: Instead of
Save, clickSave and add anotherto save you some clicks. You gotta love Django right?
Show me the books!
The books are store in a database but you need to present them somehow to your users. So let's create a page that will show those books.
For each page, you need to 3 things:
- URL, where your page can be accessed
- View that is a bridge between the model and the template
- Template that will consist of some
HTMLand dynamic data for the books
URL
There's a file urls.py in the project's directory. But as I mentioned before, there can be only one project and multiple apps.
Putting your app's URLs in the project's urls.py can quickly become a tangled mess.
To prevent that, create a new file "bookclub/urls.py" and include it in the main urls.py file:
# tutorial/urls.py
from django.contrib import admin
from django.urls import path, include

urlpatterns = [
    path('admin/', admin.site.urls),
    path('', include('bookclub.urls')),
]
Don't forget to import
include
Now open the newly created bookclub/urls.py file and write the following in it:
# bookclub/urls.py
from django.urls import path
from . import views

urlpatterns = [
    path('', views.all_books, name="all_books"),
]
Url patterns define url paths that exist inside your application. For example, /books. At this point, you're building the first page, home page, so you defined your path as '' - that translates to /. You'll be able to access this page at http://localhost:8000. The next parameter of the path is a view function. View function will receive the request from a browser and return an HTML page that will be shown in a browser. The name attribute is optional, but by assigning it, you will be able to reference it in the view methods and templates.
Assigning a name also means that you can easily change the path, without the need for a change everywhere else in the project.
You might have noticed that you're importing something that doesn't exist? It's view function all_books. Let's proceed and create it.
View
View function is a Python function that takes a Web request and returns a Web response. In it, you can write the logic you need to return the correct response.
By convention, the view functions are written in a file views.py.
Many of your views will return something from your models combined with a template, but not necessarily. You could also return a simple string with some HTML if you'd have some reason for it.
Open bookclub/views.py and add a all_books view to it:
# bookclub/views.py
from django.shortcuts import render


def all_books(request):
    return render(request, 'bookclub/all_books.html')
The render method is Django's method that combines the given template with the context dictionary and returns a HttpResponse with rendered text.
Template
The all_books.html file you passed to the render method doesn't exist yet. By default, Django loads templates from all templates directories inside your apps. To make templates accessible to Django you should create a new folder "bookclub/templates". If you would put all_books.html inside that folder you could call render like this return render(request, 'bookclub/all_books.html'). To avoid the name collision it's suggested to create another folder inside "bookclub/templates". This creates namespace for your templates. This way you can have index.html inside app bookclub, app users, etc.
BookClub
    └── bookclub
        └── templates
            └── bookclub
                └── all_books.html
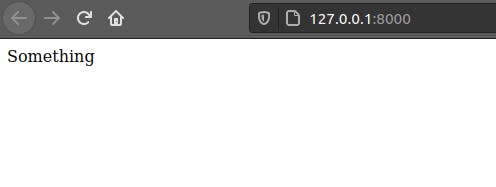
So let's create a new folder "bookclub/templates/bookclub" and add a new file all_books.html inside:
Something
Check your application in a browser at http://localhost:8000.
If you have an error, stop the server by pressing
Ctrl+Cin your command line and start it again withpython manage.py runserver.
Dynamic data
You need a page that will show books stored in the database. Let's improve your view function inside "bookclub/views.py":
# bookclub/views.py
from django.shortcuts import render
from bookclub.models import Book

def all_books(request):
    books = Book.objects.all()

    return render(request, 'bookclub/all_books.html', {'books': books})
You retrieved all records of the Book model with Book.objects.all() and passed it to the template as a dictionary {'books': books}.
Key books and variable name books don't need to be the same
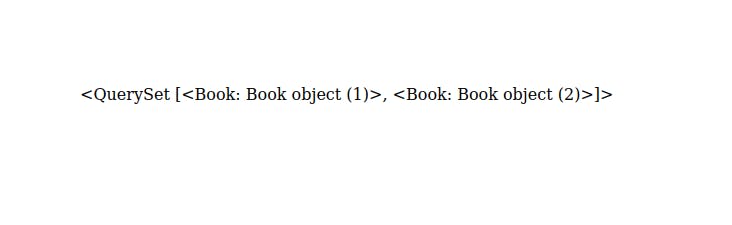
Edit all_books.html to show books:
<!--bookclub/templates/bookclub/all_books.html-->
<!DOCTYPE html>
<html lang="en">
<head>
    <meta charset="UTF-8">
    <title>BookClub</title>
</head>
<body>
{{ books }}
</body>
</html>
It's not pretty, but it's something!
Extending the template
Eventually, you'll add more templates and you don't want to keep adding the basic html tags and style/js imports to every file.
To solve that problem, Django offers a template extending.
Template extending makes it possible to use the same piece of HTML in more than one place.
This is useful for basic HTML layout, for navigation, for imports...
You'll create a base file, that will cover the basic layout of HTML and the imports, so you won't need to do that more than once.
Inside the body tags, you'll create a space for the content.
Inside the "bookclub/templates" folder, create a new file base.html:
<!--bookclub/templates/bookclub/base.html-->
<!DOCTYPE html>
<html lang="en">
<head>
    <meta charset="UTF-8">
    <title>BookClub</title>
</head>
<body>
    {% block content %}
    {% endblock %}
</body>
</html>
It's the same as all_books.html with one minor change - {{ books }} is replaced with {% block content %} {% endblock %}.
Move to the all_books.html file and delete everything except the {{ books }} part:
<!--bookclub/templates/bookclub/all_books.html-->
{% extends 'bookclub/base.html' %}

{% block content %}
{{ books }}
{% endblock %}}
You don't need the rest of the code, base.html covers it.
At the top of the file, you specified which file this template is extending -> base.html.
The {{ books }} variable is wrapped with a {% block content %} tag. That informs Django that this part of the template fits in the content block.
That's because you could have multiple blocks inside one template. In fact, add another block.
Variables vs. Tags
Variables are surrounded by
{{ }}. They output values from the context (as set in the view).Tags are surrounded by
{% %}. They provide arbitrary logic in the rendering process. They enclose if statements and for loops.
In the base.html add a block title.
{% block title %}{% endblock %}

{% block content %}
{% endblock %}>
Now you added an additional block that can be filled, named title.
You can now provide a different title for each of your pages.
Add a block title to your all_books.html file.
<!--templates/bookclub/all_books.html-->
{% extends 'bookclub/base.html' %}

{% block title %}
All the books
{% endblock %}}

{% block content %}
{{ books }}
{% endblock %}}
Refresh the page and you can see the added content.
Adding Bootstrap
Plain HTML is fine for showing information but users love beautiful applications. So let's add the Bootstrap. Edit your "bookclub/templates/bookclub/base.html":
<!--bookclub/templates/bookclub/base.html-->
<!DOCTYPE html>
<html lang="en">
<head>
    <meta charset="UTF-8">
    <title>BookClub</title>
    <link rel="stylesheet" href="https://maxcdn.bootstrapcdn.com/bootstrap/3.3.7/css/bootstrap.min.css" integrity="sha384-BVYiiSIFeK1dGmJRAkycuHAHRg32OmUcww7on3RYdg4Va+PmSTsz/K68vbdEjh4u" crossorigin="anonymous">
</head>
<body>
    <div class="container">
        <h1 class="mt-5 mb-5">{% block title %} {% endblock %}</h1>

        {% block content %}
        {% endblock %}
    </div>

<script src="https://code.jquery.com/jquery-3.5.1.slim.min.js" integrity="sha384-DfXdz2htPH0lsSSs5nCTpuj/zy4C+OGpamoFVy38MVBnE+IbbVYUew+OrCXaRkfj" crossorigin="anonymous"></script>
<script src="https://cdn.jsdelivr.net/npm/bootstrap@4.6.0/dist/js/bootstrap.bundle.min.js" integrity="sha384-Piv4xVNRyMGpqkS2by6br4gNJ7DXjqk09RmUpJ8jgGtD7zP9yug3goQfGII0yAns" crossorigin="anonymous"></script>
</body>
</html>
At the top of the file, you've imported Bootstrap from CDN. At the bottom, you've imported jQuery and Boortsratp's Javascript.
As you can see, now everything inside the body is wrapped inside the .container and h1 has a large margin at the top and the bottom (mt-5 mb-5).
Until now, you just kind-of dumped the books data.
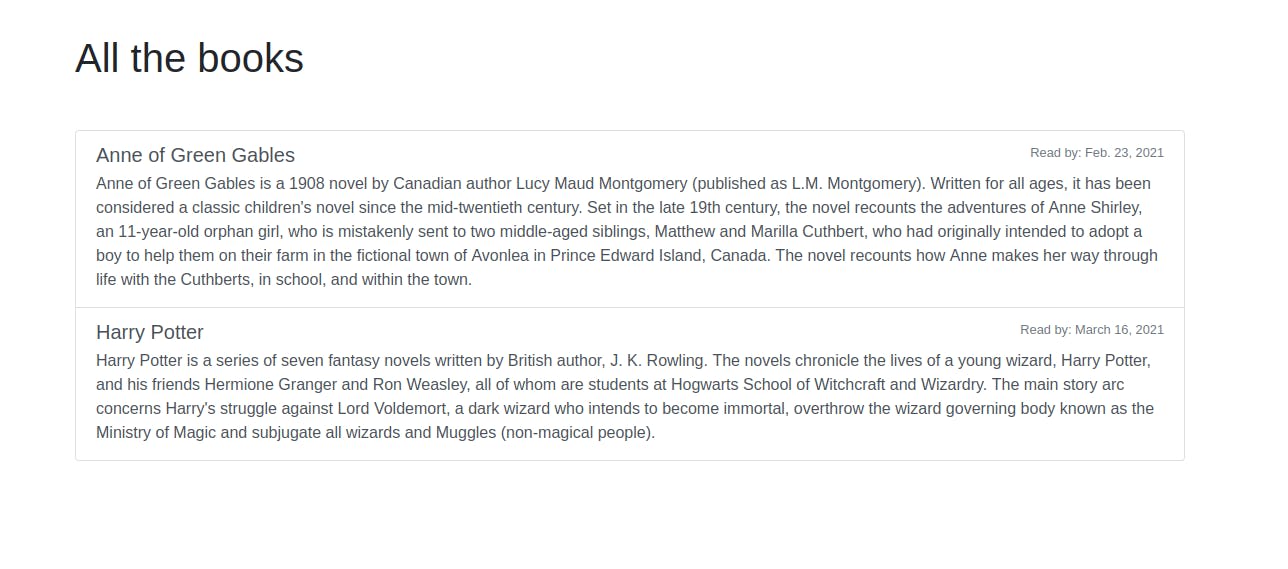
Let's list those books and add some style. Edit your "bookclub/templates/bookclub/all_books.html":
<!--bookclub/templates/bookclub/all_books.html-->
{% extends 'bookclub/base.html' %}

{% block title %}
All the books
{% endblock %}}

{% block content %}
<div class="list-group">
    {% for book in books %}
    <a href="#" class="list-group-item">
        <h4 class="list-group-item-heading">
            {{ book.book }}
        </h4>
        <p class="list-group-item-text">
            {{ book.description }}
        </p>
    </a>
    {% endfor %}
</div>
{% endblock %}}
That looks like a lot is going on in there, but it's not really that complicated.
Instead of {{ books }}, you now display each field for each book separately.
You loop through all the books one by one with {% for book in books %}. You close the forloop with {% endfor %}.
You access a single field of the current book with {{ book.fieldname }}.
All the divs and classes are just some HTML tags and some Bootstrap to make things look pretty.
Check the details about the list-group you used for styling the books here.
Group books
The upcoming and previous books should be displayed separately. To do that, you have to pass two separate variables to the template.
View
Change the view to provide two variables instead of one. One that will show only the upcoming books and another to show some of the previously read books. Edit your "bookclub/views.py":
from datetime import date
from django.shortcuts import render

from bookclub.models import Book


def all_books(request):
    upcoming_books = Book.objects.filter(read_by__gte=date.today()).order_by('read_by')[:3]
    previous_books = Book.objects.filter(read_by__lt=date.today()).order_by('-read_by')[:3]

    return render(request, 'bookclub/all_books.html', {'upcoming_books': upcoming_books, 'previous_books': previous_books})
There is a lot new going on in here, let's examine it in detail:
- Instead of
.all()method, you're now calling.filter. This simply means you're not querying all the books, but just the ones matching the query. read_byis referring to the model field,__gtemeans greater or equal to and__ltmeans less than.- In both cases, you're comparing
read_bydate to today's date. - After you got the filtered results, you're sorting them by
read_bydate.read_bysorts from today's date to the date furthest in the future ('smallest' date -> 'biggest' date)-read_bysorts it the other way around - from yesterday's date to the date furthest in the past ('biggest' date -> 'smallest' date)
[:3]shows the first 3 results.- Instead of
books, you now return values for both of your queries -upcoming_booksandprevious_books.
Create additional 5 books - 2 in the past, 2 in the future, and one with today's date.
Template
If you want to show both variables in the template, basic logic of it would go like this:
{% for upcoming_book in upcoming_books %}
{{ upcoming_book.book }}
{{ upcoming_book.read_by }}
{{ upcoming_book.description }}
{% endfor %}

{% for previous_book in previous_books %}
{{ previous_book.book }}
{{ previous_book.read_by }}
{{ previous_book.description }}
{% endfor %}
But that would produce a very ugly result.

Resort to Bootstrap to make it pretty.
Besides the list group for the books, use tabs to enable the user to switch between previous and upcoming books effortlessly. Edit your "bookclub/templates/bookclub/all_books.html":
<!--templates/bookclub/all_books.html-->
{% extends 'bookclub/base.html' %}

{% block title %}
All the books
{% endblock %}}

{% block content %}
<ul class="nav nav-tabs mb-3" id="allBooks" role="tablist">
    <li class="nav-item" role="presentation">
        <a class="nav-link active" id="home-tab" data-toggle="tab" href="#upcoming" role="tab" aria-controls="upcoming" aria-selected="true">Upcoming Books</a>
    </li>
    <li class="nav-item" role="presentation">
        <a class="nav-link" id="profile-tab" data-toggle="tab" href="#previous" role="tab" aria-controls="previous" aria-selected="false">Previous Books</a>
    </li>
</ul>
<div class="tab-content" id="allBooksContent">
    <div class="tab-pane fade show active" id="upcoming" role="tabpanel" aria-labelledby="upcoming-tab">
        <div class="list-group">
            {% for upcoming_book in upcoming_books %}
            <a href="#" class="list-group-item list-group-item-action">
                <div class="d-flex w-100 justify-content-between">
                    <h5 class="mb-1">
                        {{ upcoming_book.book }}
                    </h5>
                    <small class="text-muted">
                        Read by: {{ upcoming_book.read_by }}
                    </small>
                </div>
                <p class="mb-1">
                    {{ upcoming_book.description }}
                </p>
            </a>
            {% endfor %}
        </div>
    </div>
    <div class="tab-pane fade" id="previous" role="tabpanel" aria-labelledby="previous-tab">
        <div class="list-group">
            {% for previous_book in previous_books %}
            <a href="#" class="list-group-item list-group-item-action">
                <div class="d-flex w-100 justify-content-between">
                    <h5 class="mb-1">
                        {{ previous_book.book }}
                    </h5>
                </div>
                <p class="mb-1">
                    {{ previous_book.description }}
                </p>
            </a>
            {% endfor %}
        </div>
    </div>

</div>
{% endblock %}}
This is much prettier, right?
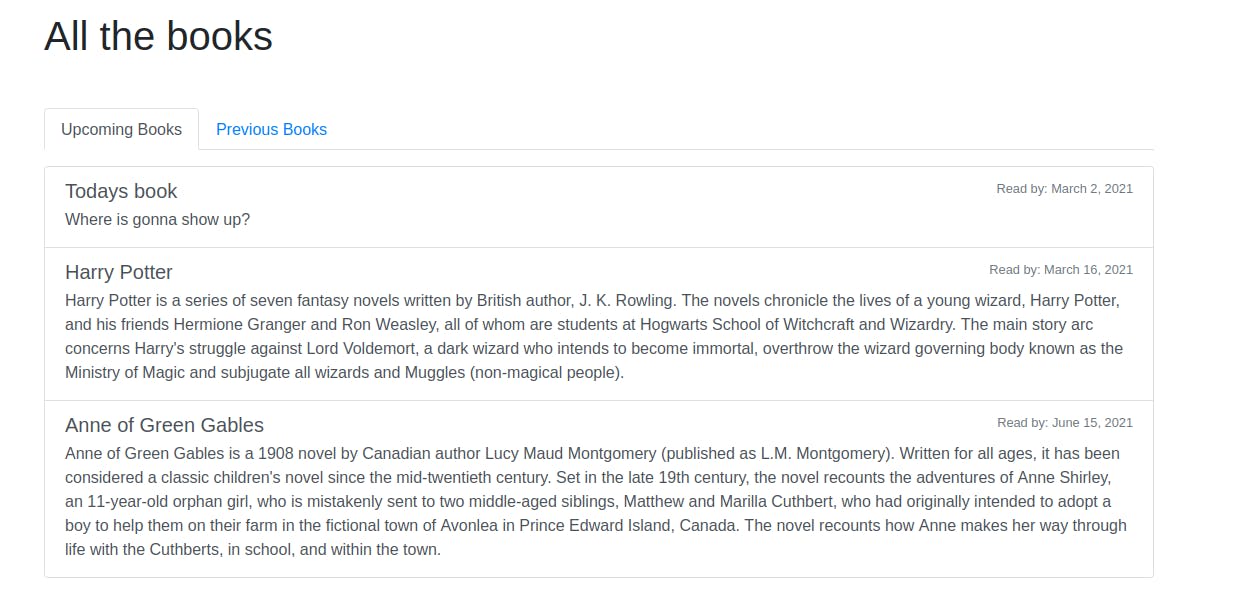
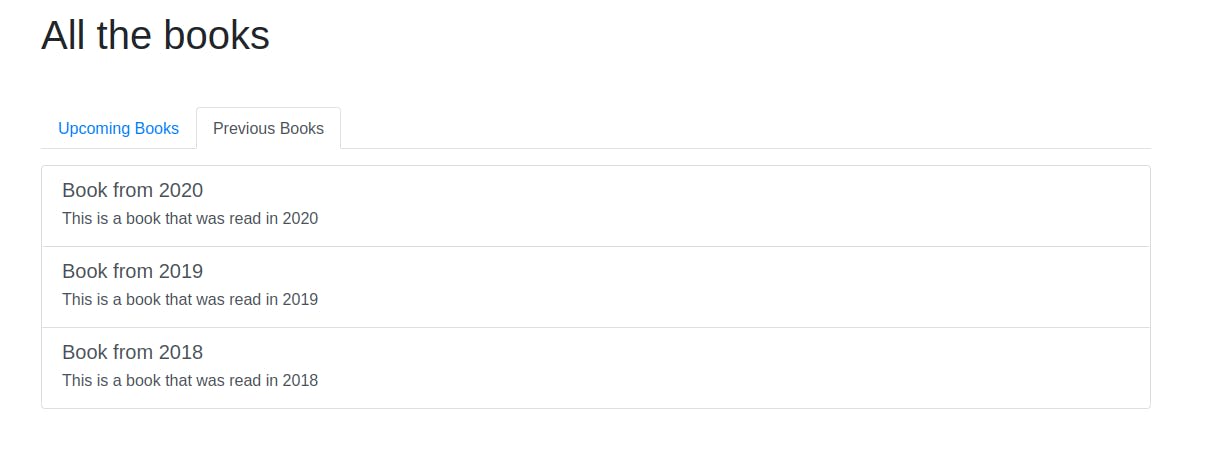
As you can see, today's book is showing in the upcoming books tab, because you used __gte in the query.
If you'd use __gt, the book with today's date would not show.
If you've created 4 upcoming books (3 with future dates and today's one), you can also see that the last one is not showing.
That's because you're showing only the 3 books closest to today's date.
Single book view
The business model predicts that users will be able to comment on the book. This means you need to have a page for a single book.
First, add the url in "bookclub/urls.py":
# bookclub/urls.py
# imports here

urlpatterns = [
    path('', views.all_books, name="all_books"),
    path('book/<int:pk>/', views.book_detail, name="book_detail"),
]
Every single book will have an url like this http://127.0.0.1:8000/book/1/.
The <int:pk> part means that in this part of url an integer is expected.
With Django's help, you will be able to extract it and match it with a book's id in the view. Add a new view for book details to "bookclub/views.py":
# bookclub/views.py

from datetime import date
from django.shortcuts import render, get_object_or_404
from bookclub.models import Book

# all_books view here

def book_detail(request, pk):
    book = get_object_or_404(Book, pk=pk)

    return render(request, 'bookclub/book_detail.html', {'book': book})
get_object_or_404 calls a get() method on the given Model and it raises 404 error when an expected object is not found.
The pk key from the url is passed to the view as a parameter and you pass it to the get_object_or_404, so it returns the book with the correct id.
pk is the abbreviation for primary key of the object. In this case, it's an ID of the row in a database.
You pass the book you get back in the context dictionary to a template book_detail.html that you have yet to create.
Add a new file named book_detail.html inside "bookclub/templates/bookclub" folder:
<!--bookclub/templates/bookclub/book_detail.html-->

{% extends 'bookclub/base.html' %}

{% block title %}
{{ book.book }}
{% endblock %}}

{% block content %}
<div class="card">
    <div class="card-body">
        {{ book.description}}
    </div>
</div>
{% endblock %}
Part of this template is very similar to the previous one:
- you extended the
base.html - you have a block
titleand blockcontent - you have divs with some Bootstrap classes
The difference is that you didn't hardcode the title of the page, but provided the title of a book in it. In the body of the card, the book description is displayed.
Link between the pages
If you navigate to http://127.0.0.1:8000/ and you try to click on the book, you'll find out that although the single page for the book exists, you can't navigate there via links.
To add that possibility, open all_books.html.
Because you loop through books two times, you need to change the HTML in the two places.
{% block content %}

<ul class="nav nav-tabs mb-3" id="allBooks" role="tablist">
    <li class="nav-item" role="presentation">
        <a class="nav-link active" id="home-tab" data-toggle="tab" href="#upcoming" role="tab" aria-controls="upcoming" aria-selected="true">Upcoming Books</a>
    </li>
    <li class="nav-item" role="presentation">
        <a class="nav-link" id="profile-tab" data-toggle="tab" href="#previous" role="tab" aria-controls="previous" aria-selected="false">Previous Books</a>
    </li>
</ul>
<div class="tab-content" id="allBooksContent">
    <div class="tab-pane fade show active" id="upcoming" role="tabpanel" aria-labelledby="upcoming-tab">
        <div class="list-group">
            {% for upcoming_book in upcoming_books %}
            <a href="{% url 'book_detail' pk=upcoming_book.pk %}" class="list-group-item list-group-item-action"> <!--          this is new-->
                <div class="d-flex w-100 justify-content-between">
                    <h5 class="mb-1">
                        {{ upcoming_book.book }}
                    </h5>
                    <small class="text-muted">
                        Read by: {{ upcoming_book.read_by }}
                    </small>
                </div>
                <p class="mb-1">
                    {{ upcoming_book.description }}
                </p>
            </a>
            {% endfor %}
        </div>
    </div>
    <div class="tab-pane fade" id="previous" role="tabpanel" aria-labelledby="previous-tab">
        <div class="list-group">
            {% for previous_book in previous_books %}
            <a href="{% url 'book_detail' pk=previous_book.pk %}" class="list-group-item list-group-item-action"> <!--          this is new-->
                <div class="d-flex w-100 justify-content-between">
                    <h5 class="mb-1">
                        {{ previous_book.book }}
                    </h5>
                </div>
                <p class="mb-1">
                    {{ previous_book.description }}
                </p>
            </a>
            {% endfor %}
        </div>
    </div>

</div>
{% endblock %}}
With url, you're ordering Django to create an url.
Url will be composed as follows:
book_detailrefers to the name you gave to your URL pattern inside the urls.py (book/<int:pk>/)- the private key (
upcoming_book.pk) for the current book is passed as a parameter, so the<int:pk>will be correctly filled.
Refresh the http://127.0.0.1:8000/ page.
Now if you click on one of the books, you should get to the single page for said book.
But you can't navigate back.
Edit your bookclub/templates/bookclub/book_detail.html to add a back button:
<!--book_detail.html-->
<div class="card">
    <div class="card-body">
        {{ book.description}}

        {% if not discussion_open %}
        <div class="alert alert-primary mt-4" role="alert">
            Read this book by: {{book.read_by}}
        </div>
        {% endif %}
    </div>
</div>
<a href="{% url 'all_books'%}" class="float-right">Back to all books</a> <!--          this is new-->
As you can see, the url creation is very similar to the previous one, the only difference is that you didn't need to provide a pk parameter.
Now you can navigate between a single book and the list.
Add some logic to the view
At this point, you just got some data from the Book model and you passed it to the template.
You can do more than that in a view - you can do something with the data you retrieved and pass that to the template.
Just seeing a book description is not very useful. You have a Wikipedia page for that. You want people to be able to discuss the book, but only if the deadline hasn't already passed. This means the template will change a little, based on the date of the deadline - upcoming books will show the deadline and previous books will have the discussion open.
To know what to show for the book in question, you need to pass some sort of a flag from the book_detail view inside "bookclub/views.py":
# bookclub/views.py
# all_ books view and other imports

from django.shortcuts import render, get_object_or_404

def book_detail(request, pk):
    book = get_object_or_404(Book, pk=pk)
    discussion_open = False

    if book.read_by <= date.today():
        discussion_open = True

    return render(request, 'bookclub/book_detail.html', {'book': book, 'discussion_open': discussion_open})
Passing a flag is as simple as that. You accessed a field on the retrieved book and if the date has already passed (or is today), the discussion_open is set to true.
Now you use that flag in the template "bookclub/templates/bookclub/book_detail.html":
<!--bookclub/templates/bookclub/book_detail.html-->
<!-- extends and block title here-->

{% block content %}
<div class="card">
    <div class="card-body">
        {{ book.description}}

        {% if not discussion_open %}
        <div class="alert alert-primary mt-4" role="alert">
            Read this book by: {{book.read_by}}
        </div>
        {% endif %}
    </div>
</div>

{% if discussion_open %}
<p class="success"> Discussion is opened. </p>
{% else %}
<p class="alert"> Discussion is not enabled yet for this book.</p>
{% endif %}
{% endblock %}
You added 2 if blocks. If the discussion_open is false, you display the deadline inside the card.
At the bottom, you display two different notices, based on if the deadline has already passed or not.
As for the books whose deadline has not passed yet, you covered everything. As for the books that should have discussion enabled, this is the next thing you're going to do.
Discussion model
You'll need another model for the discussion. Each instance of the Discussion model will be connected to one of the Book instances and one of the User instances via foreign keys.
# bookclub/models.py

from django.db import models


class Book(models.Model):
# ...


class Discussion(models.Model):
    book = models.ForeignKey('bookclub.Book', related_name='discussion', on_delete=models.CASCADE)
    author = models.ForeignKey('auth.User', related_name='records', on_delete=models.CASCADE)
    opinion = models.TextField()
You have the opinion (TextField) for the Discussion instance and two foreign keys we already mentioned - the book for which comment is intended and the author of the comment.
ForeignKey is a field that represents many-to-one relationships.
In this case, you're connecting the Discussion model with Book model you created and with Django's out-of-the-box User model.
The first positional argument in the ForeignKey class is the class to which the model is related (in our case bookclub.Book and auth.User) and it is required.
You can access models in another application by specifying the name of the application first (
auth); the second part is the name of the model (.User).
on_delete specifies what happens with the instances of the current model if the model accessed with ForeignKey is deleted (eg. if you delete the book, you'd want all the comments on a said book to be deleted too. That's what you achieve by models.CASCADE).
related_name is a name by which you can access the Discussion instances from the related Model (Book or User). Later you'll be able to see that we can access all the discussion for a book with book.discussion. .discussion being the related name we just assigned.
You made a change to your models, but your database has not been notified yet.
Run the following commands in your terminal:
(env)$ python manage.py makemigrations
(env)$ python manage.py migrate
Django forms
Django makes it easy to handle forms. It prepares and restructures data to make it ready for rendering, creates HTML forms, receives and processes submitted data from the client.
You'll create a form that will correspond to the Discussion model. This means you'll define a ModelForm.
Define a DiscussionForm in "bookclub/forms.py":
# bookclub/forms.py
from django import forms
from bookclub.models import Discussion

class DiscussionForm(forms.ModelForm):

    class Meta:
        model = Discussion
        fields = ('opinion',)
In the class Meta, you defined that you're going to connect the form with the Discussion model and the only field you have is the opinion.
fieldshave to be passed as a tuple. That means that even if you're passing only one field, the()and the,are necessary.
You need to process the form you created inside the book_detail view in "bookclub/views.py":
# bookclub/views.py
from datetime import date
from django.shortcuts import render, get_object_or_404, redirect
from django.http import HttpResponseForbidden
from bookclub.forms import DiscussionForm
from bookclub.models import Book

def book_detail(request, pk):
    book = get_object_or_404(Book, pk=pk)
    discussion_form = DiscussionForm()
    discussion_open = False

    if book.read_by <= date.today():
        discussion_open = True

    if request.method == "POST":
        form = DiscussionForm(request.POST)

        if not request.user.is_anonymous:

            if form.is_valid():
                opinion = form.save(commit=False)
                opinion.author = request.user
                opinion.book = book
                opinion.save()

                return redirect('book_detail', pk=book.pk)
        else:
            return HttpResponseForbidden("Forbidden")

    return render(request, 'bookclub/book_detail.html', {'book': book, 'discussion_open': discussion_open, 'discussion_form': discussion_form})
You added a new instance of DiscussionForm in the book_detail view, and you passed it to the template.
That's all that is needed for displaying it.
But when the user submits it, you need to do a little more:
- you create an instance of the
DiscussionFormand fill it with the data retrieved from the request - you check if the user is anonymous and if they are, you return
HttpResponseForbidden("Forbidden"). That way, you prevent unauthenticated users to post comments. - you use built-in form validation to check if the form is valid
commit=Falsemeans you don't want to save the form yet - first you need to add the data that was not supplied by the user- You can't allow the user to select the author or the discussion post on their own, you add it while processing the form:
- author is the person that submitted the request
- since the form is displayed on the page for the single book, you know exactly for which book it was submitted. You pass the book you retrieved already to display it to the form.
- you save the form manually since you prevented it from saving it in the first place
The last thing to do is to display the form in the template "bookclub/templates/bookclub/book_detail.html":
<!--bookclub/templates/bookclub/book_detail.html-->
<!--...-->
<!--<h2 class="mt-5 mb-3">Discussion</h2>-->
<!--{% if discussion_open %}-->

    <b>What are your thoughts on the book?</b>
    {% if user.is_authenticated %}
    <form method="post">
        {% csrf_token %}
        {{ discussion_form.as_table }}
        <br>
        <button type="submit" class="btn btn-primary mt-2">Submit</button>
    </form>
    {% else %}
    <div class="alert alert-warning">Only registered users are allowed to post their opinion.</div>
    {% endif %}

<!--{% else %}-->
<!--...-->
Since posting a comment is allowed only to registered users, you check if the user is logged in with {% if user.is_authenticated %}.
From here on, we're working with a logged-in user. If you're able to see the "Only registered users are allowed to post their opinion.", navigate to 127.0.0.1:8000/admin/login and login with your superuser.
Using the csrf_token provides protection against Cross Site Request Forgeries.
You can display the form you created in many ways. Here you simply rendered the whole form as a table. You also could display just the one field without the label, it would be prettier, but would mean unnecessary complications.
The form looks less than ideal, but we're changing it right at the beginning of the second part - COMING SOON, don't worry.
Displaying the discussion
You should now be able to post your opinion via the form, but you can't check that. You don't see it nor on the single book page, nor in the admin panel.
First, make it visible in the admin panel.
Edit "bookclub/admin.py" and add the Disccussion the same way you added the Book:
# bookclub/admin.py

from django.contrib import admin
from .models import Book, Discussion

admin.site.register(Book)
admin.site.register(Discussion)
If you open the http://127.0.0.1:8000/admin/, you'll be able to see the Discussions on the left side.
You can edit them or add them here if necessary.
You may expect that you need to get all the values from the Discussion in the view first.
But that's the magic of Django - you can simply access it via the Book in the template.
Add the folowing code under the form inside the {% if discussion_open %} in the bookclub/templates/bookclub/book_detail.html:
<!--templates/bookclub/book_detail.html-->
<!--    ... -->
<!--    {% else %}-->
<!--    <div class="alert alert-warning">Only registered users are allowed to post their opinion.</div>-->
<!--    {% endif %}-->

    {% for opinion in book.discussion.all %}
    <div class="card mt-4">
      <div class="card-header">
        {{ opinion.author }}
      </div>
      <div class="card-body">
        <p class="card-text">{{ opinion.opinion }}</p>
      </div>
    </div>
    {% empty %}
    <div class="alert alert-secondary mt-4" role="alert">
    There is no opinions yet for this book.
    </div>
    {% endfor %}

<!--{% else %}-->
<!--<div class="alert alert-secondary" role="alert">-->
<!--    Discussion is not enabled yet for this book.-->
<!--...-->
This is the beauty of Django - you access all the opinions users posted under a particular book with book.discussion.all.
Inside the for tags, you access its fields the same ways for the book - opinion.field.
Another thing you may noticed - {% empty %} tag.
This is a tag, used inside the for loop that executes if the list you loop through is empty.
If there's a discussion going on under the book, the details about every opinion will be displayed.
But if there's no discussion, the alert about no opinions will get displayed.
This means that instead of {% if book.discussion.all %} ... {% else %} you get to use {% empty %}.
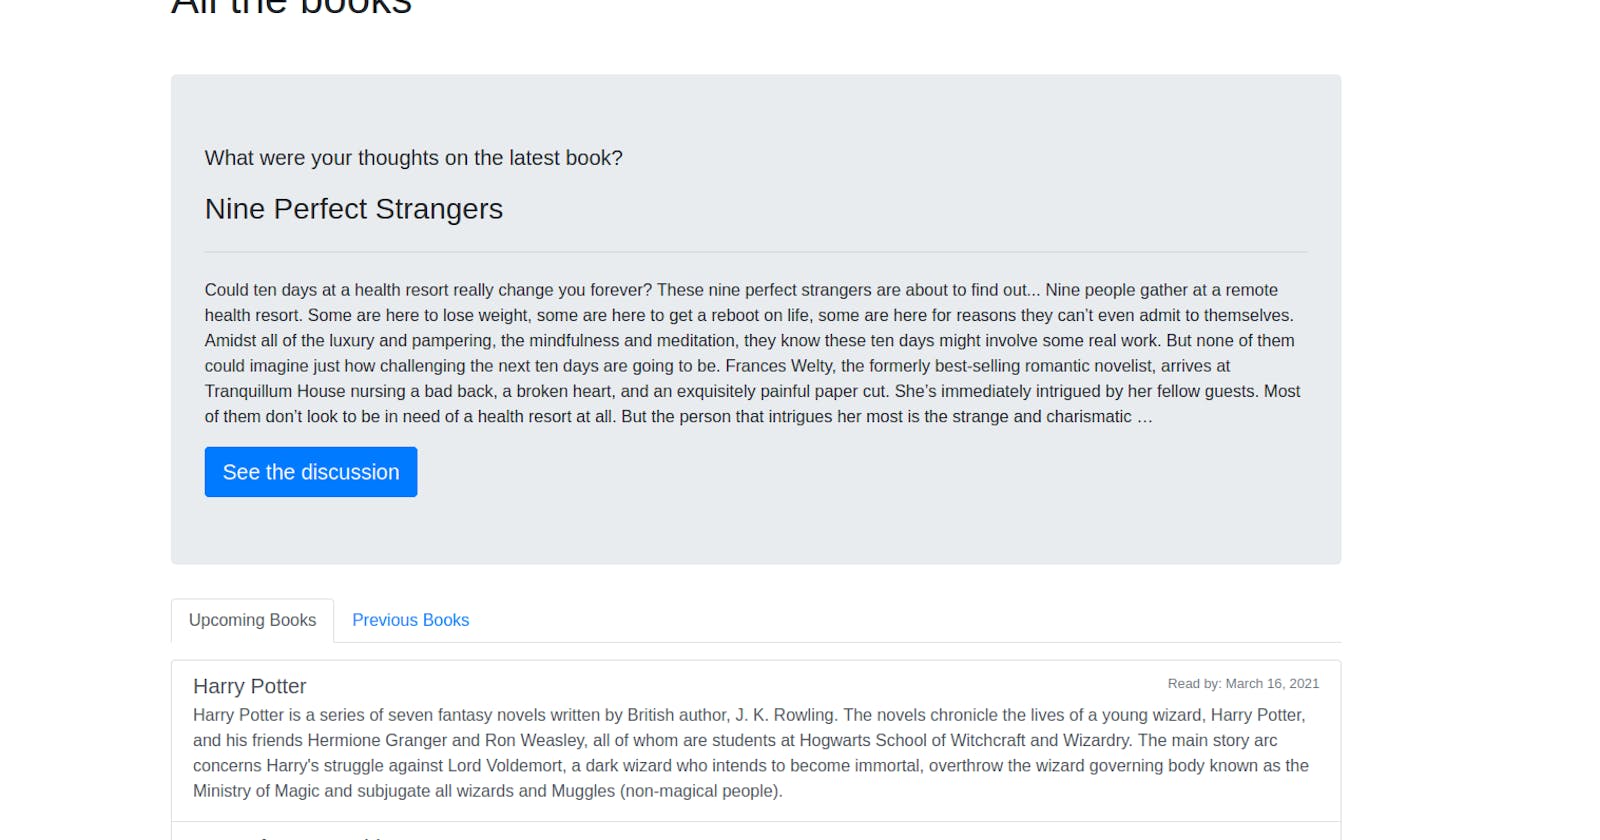
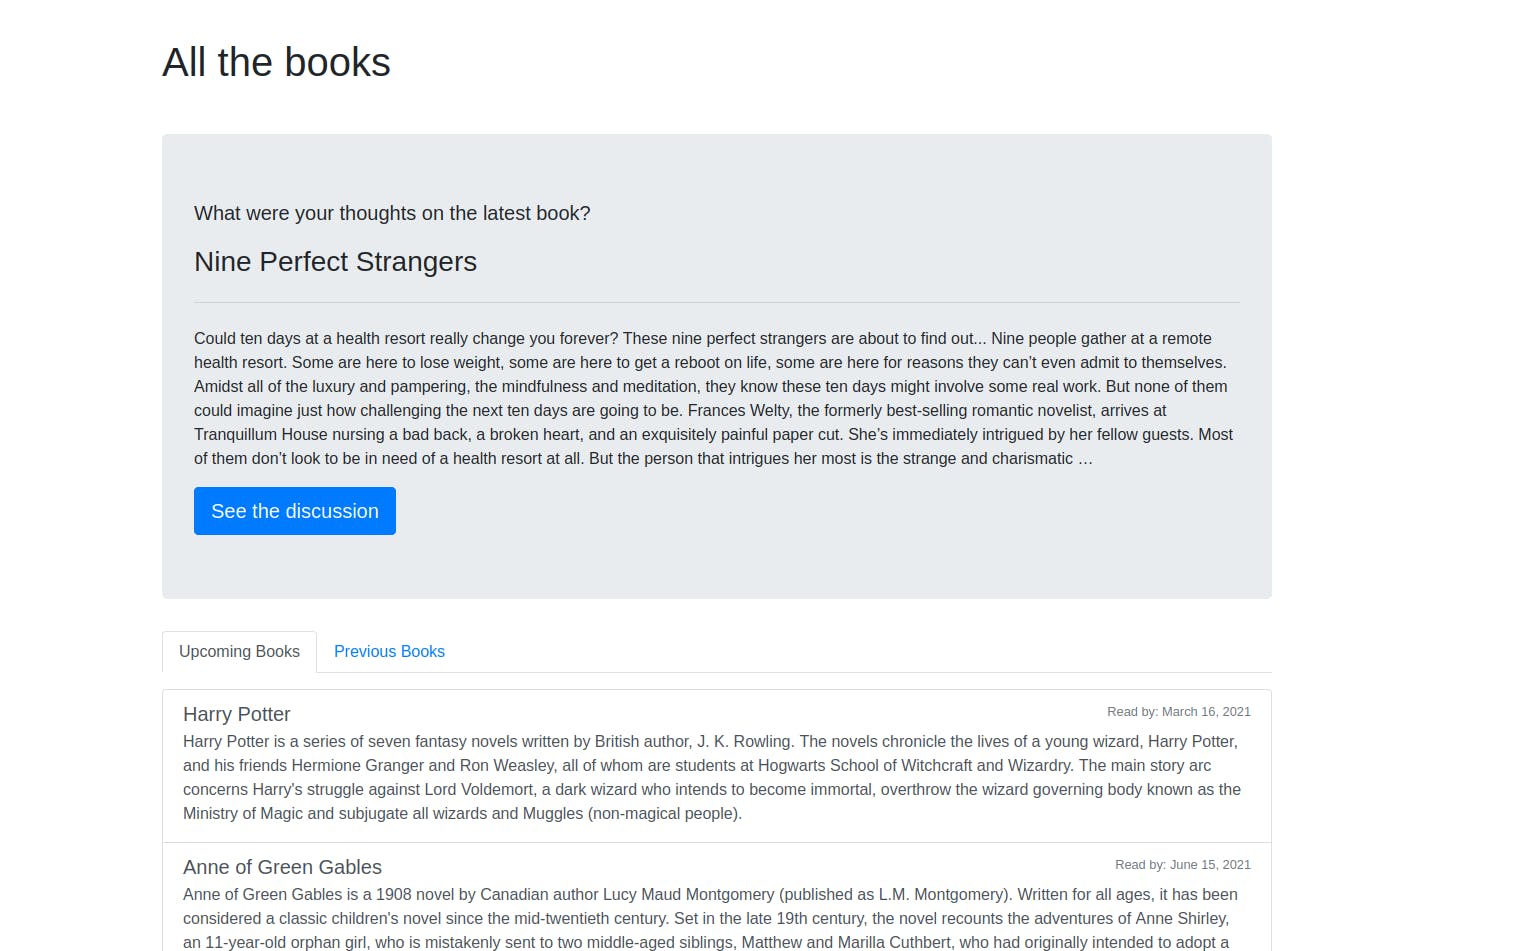
Display the latest book for discussion
Currently, discussing the book is not the first thing that comes to the user's mind when on your webpage. Turn their attention to it by displaying the latest book they should read.
Add a 'featured' box at the top of your "bookclub/templates/bookclub/book_detail.html":
<!--bookclub/templates/bookclub/book_detail.html-->
<!--...-->
<!--{% block content %}-->
{% if previous_books %}
<div class="jumbotron">
    <p class="lead">What were your thoughts on the latest book?</p>
    <h3>{{previous_books.0.book}}</h3>
    <hr class="my-4">
    <p>{{previous_books.0.description|truncatewords:150}}</p>
    <a class="btn btn-primary btn-lg" href="{% url 'book_detail' pk=previous_books.0.pk %}" role="button">See the discussion</a>
</div>
{% endif %}
<!--<ul class="nav ... -->
All you did here is select the first book from the array of the previous books and displayed its data. To avoid an ugly error if there are no previous_books, you need to first check if there are any previous books.
Conclusion
The pool of knowledge of Django is deep and wide. You've only scratched a surface, but even with that, you can create a lot.
Now you know how to create a Django project and an app in it.
You learned a good flow for creating a page:
Model -> Url -> View -> Template
You learned about template extending and how to make your pages prettier with Bootstrap.
The whole code can be found on GitLab.
This tutorial is the first in a series that covers Django from first steps to deployment. Feel free to stick around for the whole series. In the second part - COMING SOON, you'll learn how to customize the admin interface, use Django packages, add custom CSS...