Fluent in Django: 10+ Django template filters you should know

I'm passionate about learning new things -- both for myself and for teaching others. I'm a fan of Python and Django and want to know everything there is about those two. When I'm not writing code or a blog, I'm probably trying something new, reading, or spending time outside with my family.
Prerequisites
You will need the basic knowledge of Django. If you don't feel comfortable with Django yet, try this beginner-friendly tutorial.
Django template filters
While tags lives between curly braces and a percent ({% tag %}), variables live between double curly braces ({{ variable }}).
You can influence the variable by using filters.
Filters are functions registered to the template engine that takes a value as input and return transformed value.
IF YOU'RE CURIOUS
All the default filter functions are written in a file
defaultfilters.py. This is how a wordcount filter looks like:@register.filter(is_safe=False) @stringfilter def wordcount(value): """Return the number of words.""" return len(value.split())
A filter is separated from a variable with a pipe {{ variable|filter }}.
It is possible to use more than one filter on the variable - you just add another pipe and specify the filter ({{ variable|filter1|filter2 }}).
Initial setup
We will work on a similar project as for the Django template tags. If you did that tutorial, feel free to skip the initial setup and work on the project you created based on the Django template tags tutorial. We will work on a template with a different name, so feel free to join the initial setup from where we're changing the
tutorial/urls.py. If you didn't you'll be easily able to follow, just go through the initial setup first.
Start with setting up a new Django project:
$ mkdir django_template_tutorial
$ cd django_template_tutorial
$ python3.9 -m venv venv
$ source venv/bin/activate
(venv)$ pip install Django
(venv)$ django-admin startproject django_template_filters .
Create a new app:
(venv)$ django-admin startapp tutorial
```__

and register it:
```python
# django_templates/settings.py

INSTALLED_APPS = [
    'django.contrib.admin',
    'django.contrib.auth',
    'django.contrib.contenttypes',
    'django.contrib.sessions',
    'django.contrib.messages',
    'django.contrib.staticfiles',
    'tutorial',
]
Create a model called Expense:
# tutorial/models.py
from django.db import models


class Expense(models.Model):
    datetime = models.DateTimeField()
    name = models.CharField(max_length=100)
    amount = models.FloatField()
Create and run the migrations:
(venv)$ python manage.py makemigrations
(venv)$ python manage.py migrate
If you got lost during the initial setup, I encourage you to go back to basics.
Create a folder called templates inside the tutorial folder and inside it, another folder, again called tutorial.
Inside said structure, create a template called filtered_expenses.html:
django_templates
    └── tutorial
        └── templates
            └── tutorial
                └── filtered_expenses.html
Create a basic html for your filters:
<!--tutorial/templates/tutorial/filtered_expenses.html-->

<!DOCTYPE html>
<html lang="en">
<head>
    <meta charset="UTF-8">
    <title>Expenses</title>
    <link rel="stylesheet" href="https://stackpath.bootstrapcdn.com/bootstrap/4.3.1/css/bootstrap.min.css" integrity="sha384-ggOyR0iXCbMQv3Xipma34MD+dH/1fQ784/j6cY/iJTQUOhcWr7x9JvoRxT2MZw1T" crossorigin="anonymous">
</head>
<body>
<div class="container mt-5">
    <!-- we'll add the code for filters here when we finnish the setup-->
</div>
</body>
</html>
Everything we're going to add will be added between the <div class="container mt-5"> and </div>.
Now we need to create an url where our template will be shown.
Open django_templates/urls.py and include tutorial's urls in it:
# django_template_filters/urls.py

from django.contrib import admin
from django.urls import path, include  # this is new


urlpatterns = [
    path('admin/', admin.site.urls),
    path('', include('tutorial.urls')), # this is new
]
We haven't created tutorial/urls.py yet.
# tutorial/urls.py

from django.urls import path
from tutorial import views

urlpatterns = [
    path('', views.filter_expenses_list),
]
And the last thing is to create a view called filter_expenses_list:
# tutorial/views.py

from django.shortcuts import render
from tutorial.models import Expense


def filter_expenses_list(request):
    filter_expenses_list = Expense.objects.order_by('-datetime')

    return render(request, 'tutorial/filtered_expenses.html', {'expenses': filter_expenses_list})
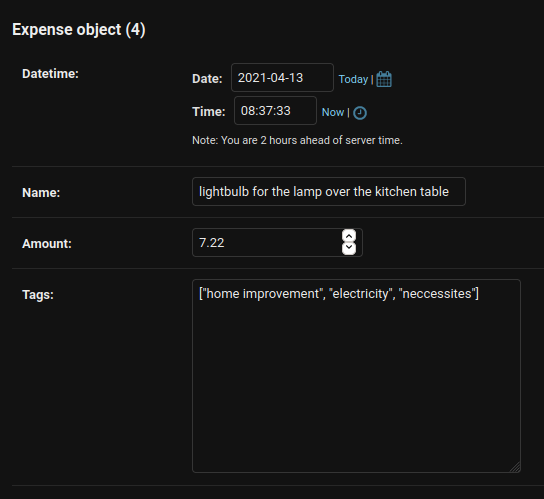
The last thing to do is to add some expenses via admin so we will be able to work with something.
Register the Expense model on the admin site in the admin.py file:
# tutorial/admin.py

from django.contrib import admin
from .models import Expense

admin.site.register(Expense)
Create the superuser:
(venv)$ python manage.py createsuperuser
Start the server:
(venv)$ python manage.py runserver
Open http://127.0.0.1:8000/admin/, log in with the superuser you created, and add 5 expenses.
This was a long setup, right? Since this is an advanced tutorial, I didn't explain the setting project up. If you didn't understand something, feel free to consult the beginners tutorial.
Let's get to work
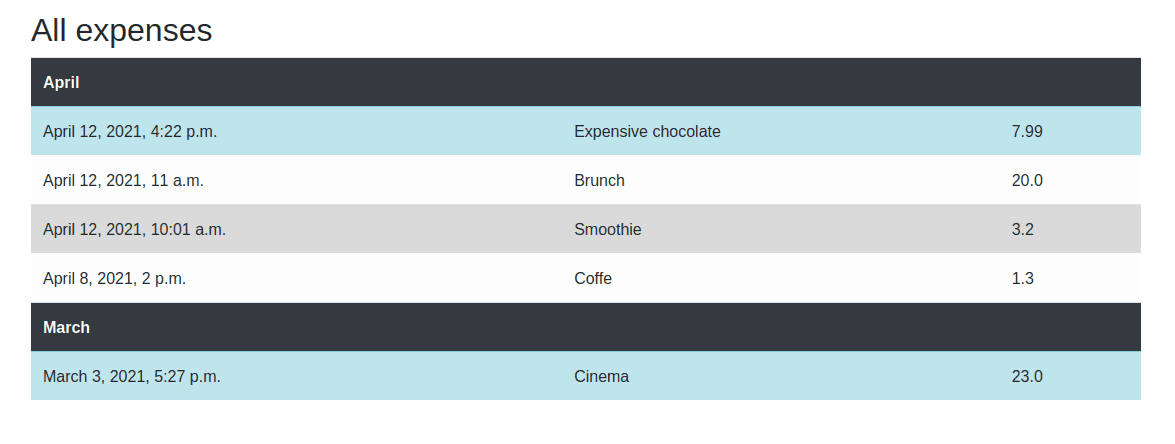
Change case
Filters allow you to change the case on the word - word can be all caps, all lowercase, you can capitalize the first letter... To see the effect of each of those filters, open your admin panel and make the expense names varied - one all lowercase, one starting with a number, one with multiple words...
Edit your html file, so it will list the expenses in a table:
<!--templates/tutorial/filtered_expenses.html-->
<table class="table">
    <tbody>
    {% for expense in expenses %}
    <tr>
        <th>{{ expense.name }}</th>
        <th>{{ expense.datetime }}</th>
        <th>{{ expense.amount }}</th>
    </tr>
    {% endfor %}
</table>
We will be adding different filters to {{ expense.name }} part.
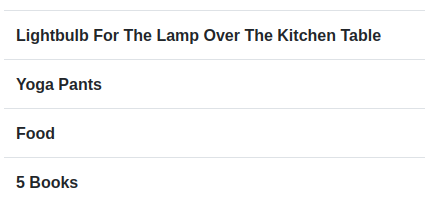
title
title converts a string into a title case by making words start with an uppercase character and the remaining characters lowercase.
<!--templates/tutorial/filtered_expenses.html-->
<table class="table">
    <tbody>
    {% for expense in expenses %}
    <tr>
        <th>{{ expense.name|title }}</th> <!-- filter added -->
        <th>{{ expense.datetime }}</th>
        <th>{{ expense.amount }}</th>
    </tr>
    {% endfor %}
</table>
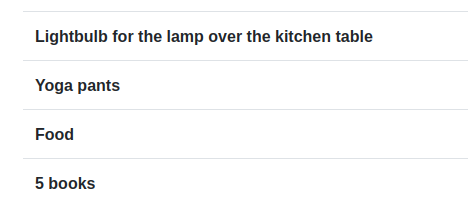
capfirst
capfirst capitalizes the first character of the value. If the first character is not a letter, this filter has no effect.
Switch title for capfirst filter to the {{ expense.name }}.
<!--templates/tutorial/filtered_expenses.html-->
<table class="table">
    <tbody>
    {% for expense in expenses %}
    <tr>
        <th>{{ expense.name|capfirst }}</th> <!-- filter added -->
        <th>{{ expense.datetime }}</th>
        <th>{{ expense.amount }}</th>
    </tr>
    {% endfor %}
</table>
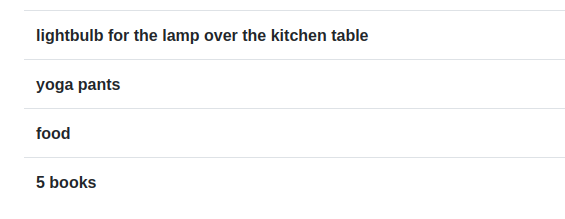
lower
lower converts a string into all lowercase. Switch the capfirst for a lower.
<!--templates/tutorial/filtered_expenses.html-->
<table class="table">
    <tbody>
    {% for expense in expenses %}
    <tr>
        <th>{{ expense.name|lower }}</th> <!-- filter added -->
        <th>{{ expense.datetime }}</th>
        <th>{{ expense.amount }}</th>
    </tr>
    {% endfor %}
</table>
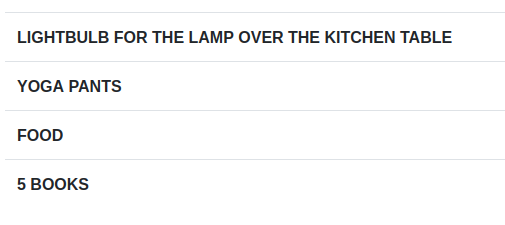
upper
upper converts a string into all uppercase. Switch the lower for an upper.
<!--templates/tutorial/filtered_expenses.html-->
<table class="table">
    <tbody>
    {% for expense in expenses %}
    <tr>
        <th>{{ expense.name|upper }}</th> <!-- filter added -->
        <th>{{ expense.datetime }}</th>
        <th>{{ expense.amount }}</th>
    </tr>
    {% endfor %}
</table>
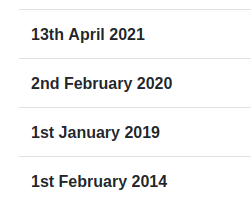
date
Let's say we're only interested to show the date of the expense, not the time.
Edit the {{ expense.datetime }} part in the template:
<!--templates/tutorial/filtered_expenses.html-->

<!--templates/tutorial/filtered_expenses.html-->
<table class="table">
    <tbody>
    {% for expense in expenses %}
    <tr>
        <th>{{ expense.name }}</th>
        <th>{{ expense.datetime|date:"jS F Y" }}</th> <!-- filter added -->
        <th>{{ expense.amount }}</th>
    </tr>
    {% endfor %}
</table>
|date is usually followed by a colon and a desired format in the string. If not, DATE_FORMAT is used (you can set it in settings.py).
In this case, we displayed the date as:
- days:
jS- day of the month without the leading zero (j) + English ordinal suffix for the day of the month (S) - month:
F- the full-textual name of the month - year:
Y- 4 digits year
You can check all the possible date formats in the documentation.
In the same way, you set the time format. You can also combine it to show both.
timesince
timesince formats a date as the time since the date in the variable. Let's provide a user with a notice as to how much time has passed since their last expense.
Add this code to your html file:
<!--templates/tutorial/filtered_expenses.html-->

<div class="alert alert-success">
    It's been {{ expenses.0.datetime|timesince }} since your last expense.
</div>
timesince shows: years, months, weeks, days, hours, minutes.
However, the time that passed is not always exact (the difference between 2020-02-02 and 2021-04-21 is "1 year, 2 months").

Similar to
timesinceis a timeuntil except that it goes from now to the date in the future.
random
random returns a random item from the given list.
How about we show the user some random saying about money to encourage them to spend money thoughtfully?
Create a list of sayings in the view and pass it to the template:
# tutorial/views.py

def filter_expenses_list(request):
    filter_expenses_list = Expense.objects.order_by('-datetime')

    # this is new
    encouragements = [
        "Opportunity is missed by most people because it is dressed in overalls and looks like work.",
        "Money is a means to get through this world, but it cannot add a day to our lives.",
        "It’s good to have money and the things that money can buy, but it’s good too to check up once in a while and make sure that you haven’t lost the things that money can’t buy.",
        "And when you start putting some rainy-day money aside, you’ll understand that it isn’t “doing nothing.” It’s letting you sleep at night."
    ]

    return render(request, 'tutorial/filtered_expenses.html', {'expenses': filter_expenses_list, "encouragements": encouragements}) # encouragaments variable is new
Add this in your html file:
<!--templates/tutorial/filtered_expenses.html-->
<div class="card mb-3">
    <h5 class="card-header">Message of encouragement</h5>
    <div class="card-body">
        <p class="card-text">{{ encouragements|random }}</p>
    </div>
</div>
You provided a list of strings and now random each time the page refreshes outputs one.

unordered_list
unordere_list creates an html list out of a python list. The list can be nested.
the list is created without the
<ul>tags.
We've shown a random saying about the money. But what if someone would like to see all of the sayings? Let's create an html list of all our sayings:
<!--templates/tutorial/filtered_expenses.html-->

<ul>
    {{ encouragements|unordered_list }}
</ul>

Add expense tags
Lets's say you want your users to be able to use tags, so they can group their expenses, etc.
Open models.py and add a tags JSONfield:
# tutorial/models.py

class Expense(models.Model):
    datetime = models.DateTimeField()
    name = models.CharField(max_length=100)
    amount = models.FloatField()
    tags = models.JSONField()
Apply the migrations:
(venv)$ python manage.py makemigrations
(venv)$ python manage.py migrate
Go to the admin panel and add few tags in a JSON format.
slice
There is no limit as to how many tags your user enters. But you can't show 25 tags.
You'll use slice to show just the first 2 tags.
slice returns a slice of the list, using the same syntax as Python’s list slicing.
<!--templates/tutorial/filtered_expenses.html-->

<div class="row m-4">
    {% for expense in expenses %}
    <div class="card m-2" style="max-width: 18rem;">
        <div class="card-body">
            <h5 class="card-title">{{ expense.name }}</h5>
        </div>
        <div class="card-footer bg-transparent">
            {{ expense.tags|slice:":2" }} <!-- slice -->
        </div>
    </div>
    {% endfor %}
</div>
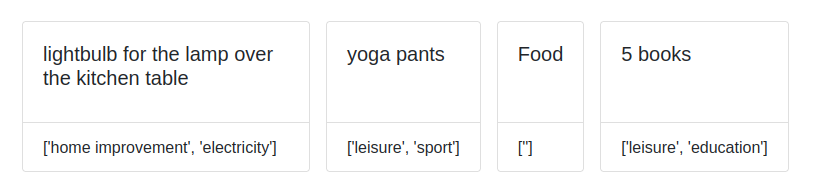
As you can see, 2 tags are showing at most.
cut
The Food expense has no tags and it looks super ugly.
You can get rid of the empty list with cut. cut removes all values of the argument from the given string.
<!--templates/tutorial/filtered_expenses.html-->

<div class="row m-4">
    {% for expense in expenses %}
    <div class="card m-2" style="max-width: 18rem;">
        <div class="card-body">
            <h5 class="card-title">{{ expense.name }}</h5>
        </div>
        <div class="card-footer bg-transparent">
            {{ expense.tags|slice:":2"|cut:"['']" }} <!-- cut added -->
        </div>
    </div>
    {% endfor %}
</div>
Now part of the string that exactly matches the argument (['']) will be removed.
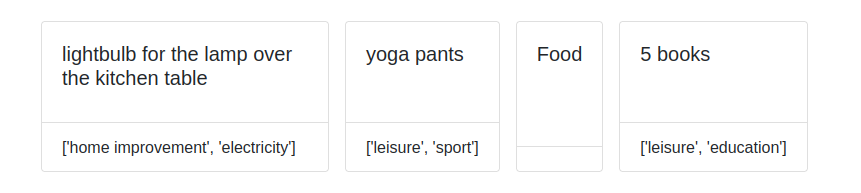
This is not the only thing going on here. As you can see, you left the slice there and added the cut. You can chain filters one after the other.
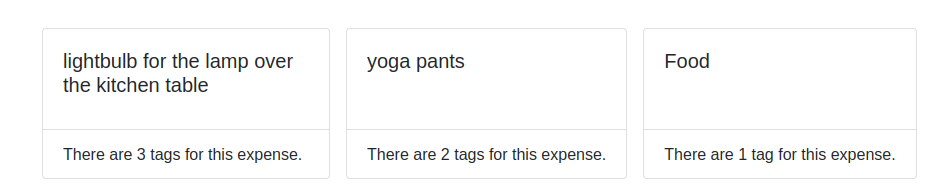
length
You don't want to show a list of tags on the expense list, you just want to show how many of the tags an expense has. This can be done with length:
<!--templates/tutorial/filtered_expenses.html-->

<div class="row m-4">
    {% for expense in expenses %}
    <div class="card m-2" style="max-width: 18rem;">
        <div class="card-body">
            <h5 class="card-title">{{ expense.name }}</h5>
        </div>
        <div class="card-footer bg-transparent">
            There are {{ expense.tags|length }} tags for this expense. <!-- show just the length of the tags list -->
        </div>
    </div>
    {% endfor %}
</div>

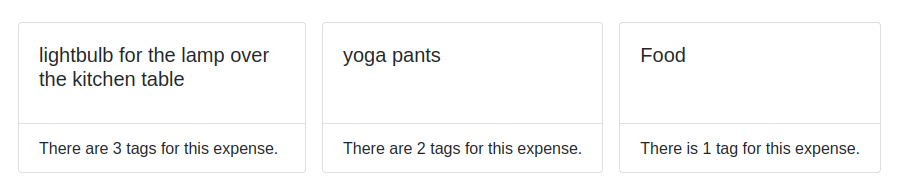
pluralize
The first two that have 2/3 tags look good. But the last one with a single tag still has written "tags" (plural) instead of "tag"(singular).
And you know what? Even that Django has covered - with pluralize.
<div class="row m-4">
    {% for expense in expenses %}
    <div class="card m-2" style="max-width: 18rem;">
        <div class="card-body">
            <h5 class="card-title">{{ expense.name }}</h5>
        </div>
        <div class="card-footer bg-transparent">
            There are {{ expense.tags|length }} tag{{ expense.tags|pluralize }} for this expense.
        </div>
    </div>
    {% endfor %}
</div>
TRICK!
You managed to cover the tag(s) problem, but there is still problem with "are" word ("There ARE 1 tag..."). You can solve that using pluralize:
<div class="card-footer bg-transparent">
  There {{ expense.tags|pluralize:"is,are" }} {{ expense.tags|length }} tag{{ expense.tags|pluralize }} for this expense.
</div>
Now "is" is used for a singular tag and "are" is used for multiple tags.
Article model
For the next couple of filters, the expenses might not be the best showcase. So let's say you add a blog to lure more clients to use your expense tracker.
Open models.py and add another model, Article:
# tutorial/models.py

class Article(models.Model):
    title = models.CharField(max_length=100)
    content = models.TextField()
apply the migrations:
(venv)$ python manage.py makemigrations
(venv)$ python manage.py migrate
Add the model to admin:
# tutorial/admin.py
from django.contrib import admin
from .models import Expense, Article

admin.site.register(Expense)
admin.site.register(Article)
Open the admin panel and add few articles.
If you have them, you need to show them.
Open views.py, retrieve all the articles, and pass them into the template:
from django.shortcuts import render
from tutorial.models import Expense, Article

def filter_expenses_list(request):
    filter_expenses_list = Expense.objects.order_by('-datetime')
    articles = Article.objects.all()

    encouragements = [
        "...",
    ]

    return render(request, 'tutorial/filtered_expenses.html', {'expenses': filter_expenses_list, "encouragements": encouragements, "articles": articles})
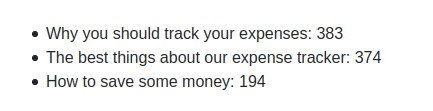
wordcount
We want to list all the articles and show how long each of them is. This can be done with the wordcount filter.
<ul>
    {% for article in articles %}
    <li>{{ article.title }}: {{ article.content|wordcount }}</li>
    {% endfor %}
</ul>
truncate
On a blog list, you usually show just a part of the text, the whole showing only in detail. Django has a few built-in possibilities to truncate the text:
- truncatechars
- truncatechars_html
- truncatewords
- truncatewords_html
Since they're so similar, we're going to use 2, but you check the other 2 in the documentation.
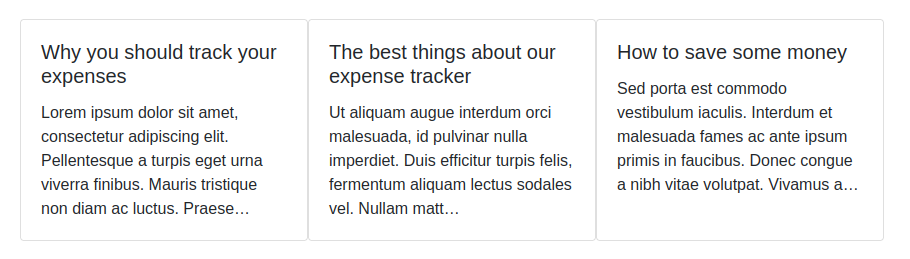
truncatechars
truncatechars truncates a string to the maximum of the specified number of characters. It ends with an ellipsis ("...").
<div class="row">
    {% for article in articles %}
    <div class="card" style="width: 18rem;">
        <div class="card-body">
            <h5 class="card-title">{{ article.title }}</h5>
            <p class="card-text">{{ article.content|truncatechars:150 }}</p> <!-- filter added -->
        </div>
    </div>
    {% endfor %}
</div>
Here we're listing the articles in cards. The content of the article is truncated at 150 characters.
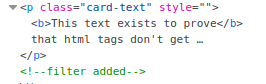
truncatewords_html
truncatewords_html truncates a string after a certain number of words with the respect to html tags. The unclosed html tags are closed immediately after the truncation.
We don't have covered the html characters in the admin (if you want to do that, you can see how it's done in this post), so we'll have to fake it.
<div class="card" style="width: 18rem;">
    <div class="card-body">
        <h5 class="card-title">{{ article.title }}</h5>
        {{ "<p class='card-text'><b>This text exists to prove</b> that html tags don't get truncated.</p>"|truncatewords_html:10 }} <!-- filter added -->
    </div>
</div>
Here we truncate a string that includes html.
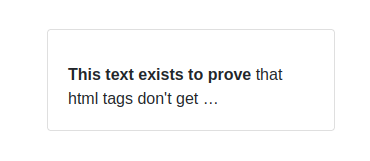
As you can see, the paragraph tag closes despite the truncation:
Conclusion
Many Django filters can be useful for you. If you want to check more than you got to know in this post, you can read about them in the documentation.
As for this tutorial, you got to know:
- different ways to change cases
- title
- capfirst
- lower
- upper
- a way to stile date
- how much time has passed since some date/time with timesince
- how to produce a random item from a list
- how to create an html unordered_list from a Python list
- how to get only a part of the list with slice
- how to cut something out of a string
- how to find out the length of the value
- how to cover case, where there can be one or multiple things with pluralize
- how to do a wordcount
- multiple possibilities for truncating text:
- truncatechars
- truncatewords_html
Cover image by Daniel Mena from Pixabay